Comprehensive instructions for using the LotPixel 3ds Max Add-on. Covers installation, auto-install via Hub, one-click imports, texture/model workflows, material setup, displacement behavior, supported render engines, and 3ds Max–specific functionality.
Complete Guide to Using the LotPixel 3ds Max Add-on
The LotPixel 3ds Max Add-on can be installed in two ways:
Plugins are installed automatically through LotPixel Hub.
When you download an asset and click Import, a window will appear asking which application you want to import the asset to (for example Blender or 3ds Max).
After selecting the application, if the required plugin is not installed, LotPixel Hub will automatically install the plugin for the selected software.
The Hub will automatically:
No manual configuration is required.
⚠️ Important:
After installation, 3ds Max must be restarted for the plugin to become active.
You can also install plugins manually from:
Settings → Plugin Config
Select the application (Blender or 3ds Max) and click Install Plugin.
If needed, you can install the plugin manually:
C:\Users\<your-username>\AppData\Local\Autodesk\3dsMax\<version>\ENU\scripts\Startup
After restart, the LotPixel menu or toolbar panel will appear automatically. No additional enabling steps are required.
The 3ds Max Add-on integrates directly with LotPixel Hub.
When you click Import inside the Hub:
Supported render engines:
No manual shader setup is required.
Note: Assets are imported into the software selected in Import Settings → Import to application inside LotPixel Hub. By default, the asset will be imported into the application that was last selected as the import to application. You can change the target application at any time when clicking the Import button.
When a texture is imported:
The node network follows the correct workflow for the selected renderer:
This ensures:
No manual node adjustments are required.
Decals are treated as material-based overlays.
When importing a Decal:
Transparency and projection behavior are configured for correct rendering without additional setup.
Imperfections work in two modes:
This allows you to add:
without rebuilding the shader.
This allows quick material creation from Imperfections alone.
When importing a 3D model:
This ensures a clean, production-ready import without manual cleanup.
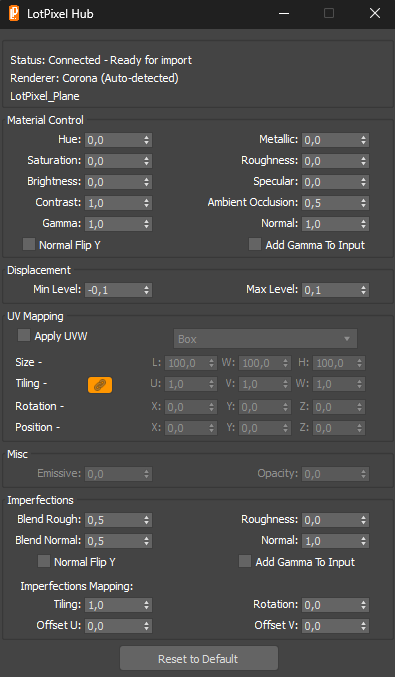
The LotPixel Add-on provides a custom UI panel inside 3ds Max for fast material adjustments.
Available controls:
These controls modify the material non-destructively and update the shader in real time.
For highest quality displacement:
EXR displacement maps are recommended.
When Displacement is enabled in the UI:
The Add-on automatically:
You do not need to manually configure:
The plugin handles these automatically when possible.